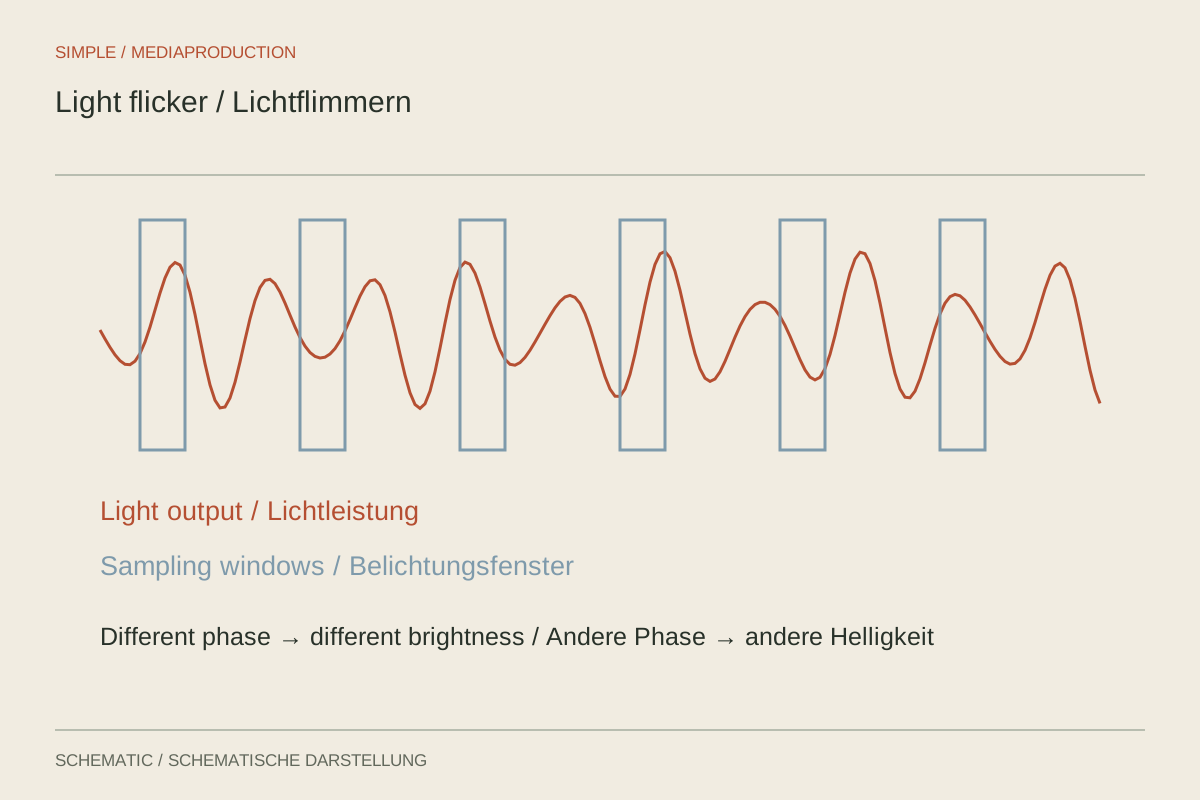
Dark bands, pulsing brightness or changing colours can appear when a lamp's time-varying output does not align with the recording. Your eyes may not notice those fluctuations. Shutter duration, frame rate and sensor readout make them visible in video. Before looking for an editing repair, test the light sources individually. An unchanged test scene makes comparisons much easier to interpret.
Find the source responsible
Point the camera at an even surface illuminated by the suspect lamp. Keep automatic exposure changes out of the test where possible so they do not create additional pulsing. Turn other lights off one at a time where permitted. If the effect disappears, you have a specific lead rather than a vague suspicion that the camera is malfunctioning.
Test different dimmer positions too. Some lamps change their temporal drive behaviour when dimmed. One setting may appear stable while another produces strong bands. Note the tested brightness alongside the camera settings. A successful full-power test does not automatically validate the reduced setting used later to balance the interview lighting.
Compare shutter settings deliberately
For mains-related fluctuations in a 50 Hz environment, 1/50 or 1/100 second are often useful test values. In a 60 Hz environment, 1/60 or 1/120 second are corresponding starting points. Sony identifies these combinations in its guidance. LEDs and electronic displays may operate at other frequencies, however, so these values are not guaranteed solutions for every source.
A camera offering finely adjustable variable shutter settings for video may help with such sources. Do not confuse this with an anti-flicker release function intended only for still photographs. Available controls depend on the model. Read the description for the actual movie mode and check the recorded result after each change rather than trusting the function's name alone.
Account for the visual consequences
A longer shutter duration changes motion blur. If fast action becomes smeared, the problem is not fully solved. The lamp may need replacing, operating at a suitable level or removing from the setup. With a screen, its display behaviour or brightness may also matter. Change one parameter at a time so you can identify which adjustment produced the improvement.
Several sources can create different problems simultaneously. A setting that stabilises the ceiling lights may not also fix an LED screen in the background. Decide which source is essential to the explanation and which can change. A troublesome decorative light does not have to remain in the composition at any cost, especially when its removal preserves more important information.
When only part of the image is affected
Imagine an interview with an LED wall behind the speaker and a separate lamp illuminating the face. The face remains stable while dark bands travel across the wall. Adjusting exposure for the entire image does not address the underlying cause. Test the wall alone and compare its available operating or brightness settings with the intended camera configuration. If no compatible combination can be found, another background may communicate more clearly.
The situation differs when the whole room grows brighter and darker as someone moves an object. Camera automation may also be reacting. Fix exposure and repeat the movement. If only the local wall disturbance remains, two separate causes have been isolated. This prevents a coincidental improvement from darkening the image being mistaken for a complete flicker solution.
A slow live preview may represent brief fluctuations differently from the file. Approval should therefore depend on the stored recording at its final playback speed. If a test looks satisfactory only at one selected moment, extend it until several repetitions of the suspicious fluctuation can be assessed.
Approve only after checking the file
Record several seconds containing an even surface and the intended movement. Play the clip on a reliable display at normal speed, then inspect suspicious moments frame by frame. The camera preview may behave differently from the stored recording, particularly when settings alter the exposure or readout behaviour.
Keep the successful combination of lamp, dimmer level, frame rate and shutter speed in the shoot notes. Changing light output or recording mode requires another test. Post-production correction can help in some circumstances, but should not justify unchecked capture while the underlying cause can still be addressed on set.